Showing posts with label RE-CREATE. Show all posts

KCWC Day 7

Sunday, October 14, 2012

While I thoroughly enjoyed committing to spending a week sewing clothing for Gavin (which I haven't done much of for a long time). I must say that the first six days left me with pieces that were nice, but not thrilling. I usually improvise parts or all of my creations so I'm usually left with details that didn't work out as intended. I realize that the rest of the world probably doesn't notice these things, so I don't worry about them much, but they do stop me from being over-the-top thrilled about the creations.

But this shirt is the reason why I allow myself to keep improvising and going in without a plan. Instead of matching things perfectly, having a pattern, sewing the right stitches in the right order, I let the fabric and the moment direct me. And when it goes this well it is so damn exciting. 

Do I sound like a total nerd? 
Yeah, it's ok, I know I do. 

So here it is, my finale to my first KCWC and my most favourite little boy shirt to date. :)

It's a strange combination of stretchy and non-stretchy fabric. All upcycled from old shirts of mine. And it has stripes (I'm obsessed with stripes, if you didn't know) and details that make the difference... like the front pocket, and the combination of vertical and horizontal stripes on the hood. Oh, and the hood has more than enough room for Gavin's big melon.

KCWC Day 5 & 6

Saturday, October 13, 2012

I made this shirt over the last two days. It is actually upcycled from an old shirt of mine. It had a teeny little hole right in the middle of the front of the shirt, so I put a big t-rex over top. Problem solved! And you know little boys, they love anything with a t-rex!


And something else in the making...

Kid Friendly Bathroom

Tuesday, September 4, 2012

Over the last few months, Mason has taken an interest in teaching Gavin good hygiene habits and making him aware of their importance. Mason works with kids who may not have been taught these things early on, so he's come to recognize how important it is to share this awareness from an early age. Gavin already knows plenty about hygiene, but I wanted to take it to the next level and start making it his responsibility. Here are a few changes I made to our bathrooms that help him keep himself clean...

We have two bathrooms, and we use each for different things. So we need two stools so that he can reach the sink.

In the bathroom that he uses to go potty, there is some fun hand soap just for him because he doesn't normally like to use it. Now it is foamy, orange & has Elmo on the bottle - a little more enticing, no?


The other bathroom is where we keep brushes, combs, toothbrushes, facecloths, etc. So I made sure that Gavin has all these things in his reach. I used a decorative bowl I had laying around and put in his toothbrush, toothpaste, a facecloth, & a brush. 


Since the only mirror in our bathroom is on a medicine cabinet high on the wall, I bought a small mirror that sits on the counter at his level so he can see what he is doing. 


I also have a bunch of clean facecloths under the sink in a basket so he can easily get a fresh one & I can restock his bowl every day. 


I considered having somewhere to put laundry in the bathroom as well, but we have two separate laundry baskets (one for towels, one for clothes) just steps away so I decided against adding another.

Refashioned: Grandma's Dress

Friday, June 29, 2012

A while back my grandma gave me a dress of hers in hopes that I could find someway to reuse it. My before picture isn't accurate because I had already chopped off the button-up, shoulder-padded top section so you'll have to use your imagination for that. 


I used the bottoms of some lululemon pants that I turned into capris to make a yoga-style, (super comfy) fold over waistband. Then I hemmed the skirt up so it falls just below my knees. The whole thing was really easy and now I have this pretty, lightweight skirt. An extra bonus? There's pockets hiding in there!


***UPDATE***
I meant to get this done before the post went up, but I didn't. Here's a photo of the skirt on (plus a distracted Gavin)! 


DIY Pencil Cup - Fabric Covered Can Tutorial

Monday, April 30, 2012

I recently got a little photo shelf for above my desk. It has made a world of difference since I have a pretty tiny desk. I wanted some containers to put pens, scissors, etc. in on the shelf, but I didn't really want to spend $8-15 on the ones I like in stores. I had covered a few old tin cans in scrapbook paper for Gavin's art table, which gave me the idea to use fabric to cover some for myself. It's pretty easy and looks a little nicer than just paper, in my opinion. I know you could probably figure it out on your own, but I decided to walk you through it anyways. :)


What you need:


an empty tin can (lid & label removed, washed & dried)
fabric
scissors
iron & ironing board
glue gun


How to make it:


Lay your tin can on fabric and roll it long, starting at the end, to roughly measure the amount of fabric you need to cover the tin can. It should have half to one inch extra on all sides. It doesn't need to be perfectly straight (see mine)!


Fold the edge you want to be on top over about half an inch and iron it flat. Make sure the fold it straight.


Place the fabric around your can, with the fold going over the top edge of the can. Check if your fabric is too long (mine was, between the blue arrows is all overlap, there should only be a little) and if it is too wide (sticking down past the bottom, which it should be). You can mark it or just eyeball it, but take note of the excess fabric.


Now trim off the overlap along the side (the amount between the blue arrows above). There should only be about half an inch overlap. Keep one of these side edges nice and straight because it will show.


Now iron the bottom edge up so that it will sit right at the bottom of the can.


All along the top, where the fabric folds over, cut out little triangles so that the fabric will sit nicely along the curve of the can.


And now get gluing! I couldn't take photos of myself gluing, so I'll have to walk you through this part...

I started by putting the top edge in place and then gluing along the edge of the fabric that will be covered, so it stayed in place. Next I glued along the bottom edge, making sure not to  wrinkle the fabric or pull the top part down. When I had almost glued all the way along the bottom I stopped (with about 1 inch left) and went to the top. You can lift a couple of the little flaps at a time and put some hot glue inside the top edge of the can and then stick the flaps down. Do this all the way around, leaving one or two flaps unattached. Now finish up the bottom and do the vertical edge of the fabric. Try your best not to use too much glue or it will ooze out. Finally, glue the last inner flaps down.


Now fill it up and you're done! The seam where the fabric meets is pretty sloppy on mine, so it faces the wall. As long as it stays put, no one will ever know. :)


Ikea Latt Makeover

Wednesday, November 2, 2011

We got this little table and chairs set for Gavin about 15 months ago from ikea.

The whole set is $25, which is an awesome price. But it has taken a bit of a beating. I had to take it apart to re-glue a section that was pulling apart because Gavin drags the table around. So I decided to give it a nice new coat of paint too!


I painted the seats before the table top which worked out really well because the stripes are a little too crazy for such a big area. I think they are cute on the seats though.


The stripes on the chair also worked out really well because one has some damage on the set. It was kind of cracked/creased, so a little sanding and a busy paint job did wonders for it.


What do you think? A good improvement?


New Recipe Page!

Tuesday, November 1, 2011

I don't know if anyone has been on my Recipe page lately, but if you have, you'll know it's been under construction for a while.

...a long while...

The new recipe page is complete and it was worth the wait!


It now has "buttons" for every recipe, with a little photo for every recipe that I have a photo for. Hopefully it will make the page easier to use. I personally like having the name of a recipe and the title, so my goal with the page makeover was to make it easier and more appealing to use.

Click over and let me know what you think. :)

Easel Makeover Complete!

Monday, October 17, 2011

Remember when I showed you the easel I brought home from the thrift store the other week? I finished it yesterday!

I'm not the best at spray painting so it took a little longer than planned, but that's ok. I used spray primer then spray paint on it, so in the end the total cost of the easel was about $18. That also includes chalkboard spray paint to redo the chalkboard... it needed it. The original one sells for $25 or so at ikea and I like the colour of this one better, so that is pretty awesome. Gavin actually picked the satin grey paint, and it was an awesome choice (who would expect a 2 year old boy to pick grey?).


I also bought a large chip clip from Walmart for $2 so we can clip paper on for even more artistic options!


Thrift

Thursday, October 6, 2011

Another awesome thing for my 23rd year? Awesome thrift store finds! Like this:


This easel sells at Ikea for $25. I bought it for $3!

I know, I know, it definitely doesn't look great. But after a scrub down (thank you, Magic Eraser!), it looks like this:


The only stuff the magic eraser couldn't get off was the shadow of the red and blue marker:


And the dents, obviously. It could use a coat of chalkboard paint on the blackboard side, but I think that will have to wait, it's just not that noticeable right now.

I picked up a little wood filler and some spray paint... The finished product coming soon!

Thrift: Owls

Thursday, September 22, 2011

On a visit to the thrift store the other day I found these two owl ornaments. They were the most hideous brown with orange rhinestones sloppily glued in the centre of their eyes (one was missing on the small owl), but they had potential. I had seen this post on Ohdeedoh and have been inspired by all the spray painting vintage items that I've seen on other blogs over the past few months so I decided these would be good to experiment with. If I failed miserably, it would only be a couple bucks lost.


The painting went really well, but you could see the glue remnants in the eyes still, so I used my silhouette to cut some vinyl for the eyes. I stuck those on and gave them a couple more coats of paint. I really liked how they turned out!


They found a nice little home on this weird tree shelf Mason bought me a year ago! Now I just need something to go on top...


Reruns: Play Cape Tutorial

Tuesday, August 30, 2011

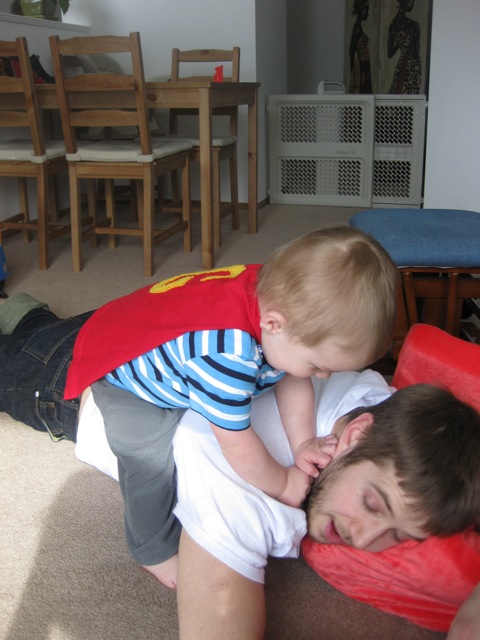
This was my first ever tutorial! Originally posted in April 2010. Gavin looks so little in the photo at the bottom. :)


My first ever tutorial is here! Welcome, and please feel free to leave me some feedback in the comments section, I'd like to know where I need work on my tutorial skills.

If you haven't yet seen these in action, check out my last post for photos of my son and his cape. This is incredibly easy to make. You can make it a simple project, like the tutorial will show, or you can get creative with other fabrics and make something more complicated.

What you need:


-Scissors
-An old t-shirt, medium works for a toddler like my son
-Sewing machine, or a needle and thread
-Thread that matches your fabric
-Some kind of marking tool for your fabric that will wash/fade out
-One sheet of felt, or a decent sized remnant, in a colour that contrasts with your base fabric
-Embroidery thread in a different colour than the felt and the base fabric
-A needle big enough to handle embroidery thread
-Ribbon, 1/4 - 3/8 inch wide

Get your measurements:

-Measure your child's shoulder width (or guess, like I did) and make this the measurement for the top of the cape. Double this number for the width of the bottom. For the length, I used the same number as the width of the bottom, but you can also measure how long you would like it to be on your child, and use that number.
-So my numbers were 8 inches wide at the top, 16 inches wide at the bottom, and 16 inches from top to bottom.

Cut out the pieces:

-Take your old t-shirt and lay it out flat on your cutting surface.
-Make sure that the bottom hem on the front and back lines up because this will be the bottom of your cape.
-If you the length of your cape is equal to or smaller than the length from below the sleeve to the hem AND there is no seam there, use this fold.
-If not, you can draw your cape on the back of the shirt by folding it and drawing it according to the following directions
-I used the right side fold for my cape
-Cut your width measurements in half (8 becomes 4, 16 becomes 8)
-Measure 8 inches (or your bottom width measurement) from the fold and mark this on the bottom of the hem
-Along the fold, measure 16 inches (or your length measurement), plus 1/4-1/2 inch for a seam allowance, from the hem and mark this
-From this mark, measure 4 inches (or your top width measurement) from the fold
-Finally, draw a diagonal line from the top to the bottom mark, it should look like this:

-Cut through both layers of fabric then open it up. What you get should look like this:

-Next you should cut your ribbon. I just made each tie 8 inches long, the same measurement as the width of the top of my cape

-You will probably want to cut the edge of your ribbon that will be showing on an angle, if your ribbon has a pattern that you want to match on both sides, remember to cut the angle on opposite sides for each ribbon

-For the last of the cutting, you need to cut your letter out of felt. For the first cape, I drew mine freehand, but for this one I used the computer.
-If you want to use a computer font, just type your letter into your word processor, make it as large as you need (I used size 375 font) and print it off.
-Tip: Try changing the font colour to a light grey so that you aren't wasting a ton of ink.
-I wanted my "M" to be wider, so I just modified it a little:

-Cut this letter out and then trace it or pin it onto your felt and cut it out.

Put it all together:

-Now that you have all the pieces, take the cape over to your sewing machine and hem the top. You can fold it over once or twice, to your taste. 
-Make sure that the hem is a little wider than your ribbon AND that you start sewing about 1/4-1/2 of an inch from the edge of the fabric on the inside of the cape because you'll be tucking the ribbon in here (see the next couple photos if you don't understand).
-Next you need to put the ribbon in; tuck it into the part of the hem that you left unstitched and sew through all the layers.
-I sewed back and forth a few times because we all know that kids put our seams to the test sometimes!
-Repeat so that both sides are attached, and your cape should look like this:
-Since this fabric doesn't fray, I left the sides unfinished.
-However, I don't trust the hem to stay put after I cut through it, so I stitched along each end of the seams so that they aren't going anywhere. If your thread matches, you'll never even notice this afterwards.
Before my added stitch
After (it is vertical, on the right side, almost invisible)
-Finally, it's time to add your felt letter. 
-I didn't use any fabric stabilizer or adhesive to apply the applique because felt is very forgiving and I'm just lazy sometimes!
-I just laid the letter where I wanted it and started stitching
-I placed it slightly off-kilter for a fun look, and because then you can't tell if it isn't exactly where I wanted it to be
-I thread my needle like the photo below so that only one layer of embroidery thread is in each stitch, rather than double.
-You can either cut the embroidery thread after you have sewn the letter on, or just cut yourself a very generous amount now
-Either way you have to pull a lot through with your first stitch, leaving a small tail on the wrong side of the cape (the photo below is what happens when you finish, you'll have two tails)
-I just did a straight stitch all the way along, but feel free to experiment with other stitches

-This is the longest and most tedious part of the project, but when you finally finish, tie the two ends of thread in a couple knots to secure it (not too tight or you'll mess up the stitches)
-Finally, trim the ends and tie the cape on your little superhero!
Warning: These capes may inspire superhero like behaviour

Thanks for reading and good luck. I'd love to hear if anyone tries this out!