Showing posts with label BABY SHOWER. Show all posts

My Favourite Baby Gift

Tuesday, November 20, 2012

If you've been around here for a while, you'll know that my favourite baby gift to give is a handmade diaper bag. I absolutely love making these bags and everyone I've given them to has loved receiving them. I made my own diaper bag before Gavin was born and have since modified the pattern. Each one I make is better, so Stacey has the best one yet. :)


This time the fusible fleece that I used was the sturdiest ever, and I love a sturdy diaper bag. Also, I think this diaper bag has the most pockets yet, with a grand total of 8! 


(on the outside: a flat pocket on the back, bottle pockets on either side and on the inside: four elasticized pockets, and one zippered pocket)

I like pockets in my purses, but for a diaper bag they are crucial - mom's tote around so much crap with their babes, and you don't want to be stuck digging around for ages when you need something. 


I also stocked the diaper bag with all sorts of handy stuff like a swaddler, onesie, wood book, teething keys, keep-it-kleen pacifier, pacifier clips, diaper genie on-the-go, bibs, a baby bottle, a mama bottle, hand sanitizer, hand lotion, travel-size baby powder, lotion, diaper rash cream, etc., gum & a sweet treat for mom, baby wipes, kleenex, and... I think that's it! I would have added diapers, but the dad-to-be had a diaper party so they already have tons.


Reruns: Cookie Cutter Soaps

Saturday, September 10, 2011

Almost a year ago I had a baby shower for my sister. If you're new and haven't checked it out, you should read through all the fun. It was a great time! I gave some bath and body items as favours and have decided to rerun them for reasons that are much too complicated to bother explaining.


This is hardly worth having a tutorial for. These soaps are that easy.


Supplies:

9x9 inch silicone pan
cookie sheet (to set the silicone pan on)
metal cookie cutter(s)

Ingredients:

Any melt and pour soap base
Soap colouring of some sort
Essential oil/fragrance oil
Carrier Oil

Directions:

I don't measure my ingredient, I just go with it. So you should fill the silicone pan with water until it is as deep as you want your soap to be thick. Pour the water into a measuring cup and that is how much soap you will need. I add coconut oil to my soaps to make them softer on the skin. Melt the soap and mix in the colour and fragrance (if you want a full melt and pour tutorial, click here). Pour into the silicone pan and let it firm up. (The fridge helps it go faster!) When the soap is completely set, turn it out onto the counter and start cutting our soaps with the cookie cutter. I placed a little plate on top of the cookie cutter so it didn't hurt my hand. 

And that's that! Cute soaps of any shape. You'll obviously have some left over soap that you can melt down and use for more of these soaps or another project later.


Reruns: Sea Salt Body Scrub

Friday, September 9, 2011


Almost a year ago I had a baby shower for my sister. If you're new and haven't checked it out, you should read through all the fun. It was a great time! I gave some bath and body items as favours and have decided to rerun them for reasons that are much too complicated to bother explaining.

These little scrubs are tons of fun to make. It's also very easy to make them look beautiful. I used Martha Stewart's recipe as a starting point, but I definitely played with them and made it my own. I don't have measurements on my recipe because I think you need to figure that out on your own. I found suggestions that said you should use 2x as much salt as oil, but that was still too oily for me.


Ingredients:

Coarse Sea Salt
Coconut oil
Another carrier oil, that is liquid at room temperature
Essential oils or fragrance oils
Food colouring or another cosmetic-grade dye

Directions:

Put your salt in a bowl. Mix colour in, drop by drop (mixing between) until desired colour is achieved. Melt your coconut oil and add a few drops of your other carrier oil. This will keep your oil from solidifying. Mix until you have a nice consistency. There shouldn't be a ton of oil that settles to the bottom even while you are stirring. If you don't know if the consistency is right, try some out on your hands. It's all about your taste. Next, add your fragrance in a little at a time. When the smell is right, spoon them into canning jars (I used 125 ml size) and seal them up. Ta-da!


Reruns: Bath Fizzy Tutorial

Thursday, September 8, 2011

Almost a year ago I had a baby shower for my sister. If you're new and haven't checked it out, you should read through all the fun. It was a great time! I gave some bath and body items as favours and have decided to rerun them for reasons that are much too complicated to bother explaining.


For my star bath fizzies, I used candy molds. They are little and don't do the massive explosion like a huge bath bomb, but I thought they were cute and they add some beautiful fragrance to your tub. Here's a rough recipe for them. For supplies, you'll need some type of mold and a spray bottle with water and your colour in it.

Ingredients:

1 cup baking soda
1/2 cup citric acid
1/4 cup sea salt
2 tbsp coconut oil
essential oil/ fragrance oil
food colouring/cosmetic grade dye

Directions:

Combine dry ingredients in a bowl. Melt coconut oil and mix in well. Add scent to your liking. Once all of that is mixed in, start spritzing it with water and stirring it in. You want it to become damp so you can pack it, but you don't want it to fizz. Once it is packable, press it into the molds as firmly as you can. Let it sit for a few hours then turn out of the molds gently and allow to dry overnight.

To get the different colours of mine, I made a first batch light coloured. There was plenty left in my bowl because I only had a 12 cavity candy mold. I let the mixture dry out while the fizzies set, then I added some more yellow dye directly to the mix. This intensified the colour. Then I went through the process as usual. As you can see I made 4 batches, making the colour more intense each time.


Baby Shower Series: The Finale

Tuesday, October 19, 2010

Good Morning!

Well, the time has come for me to wrap up the baby shower series. Which is probably good, because I'll have some halloween stuff to share right away! I'll have one more post to add once I finish the memory book, but that will take a little while. Just to recap, here's the whole process we've gone through:


And today, you get to see some pictures of the fun...


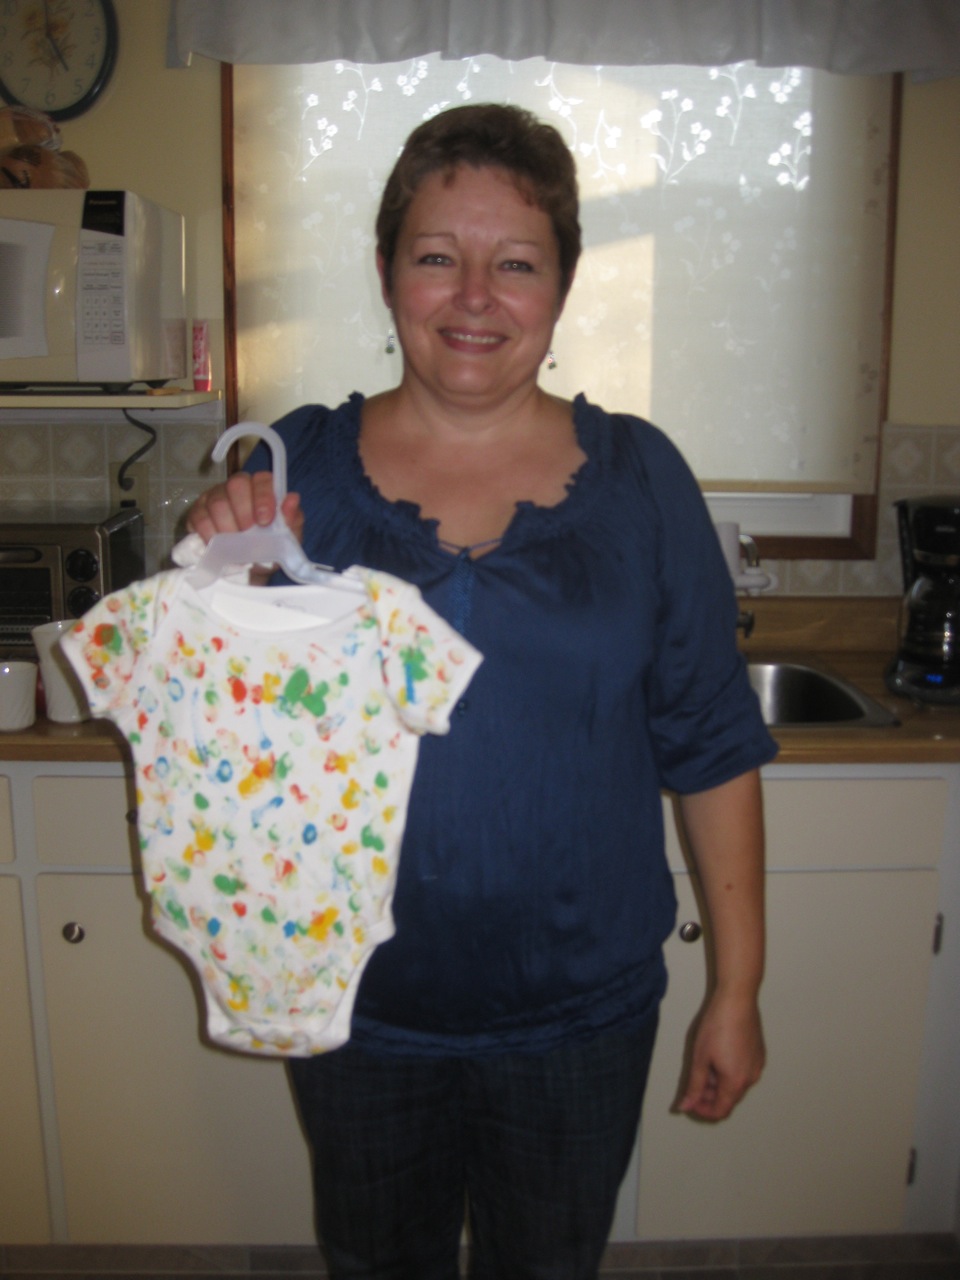
And the onesies!


Thanks for joining me for the ride, everyone. If you put on a shower like this, I'd love to hear about it!


Baby Shower Series: Memory Tags

Monday, October 18, 2010


Happy Monday, everyone!

Well, we're just about done with the Baby Shower Series. I've been trying to make sure I've covered everything, so if you have any questions at any point, feel free to ask! I'd love to answer any questions you have. :)

Today's post is an idea I got from Cathie Filian's blog (she mentions it briefly after the bit on invitations). I decided to use her idea and make some onesie shaped tags that the guests could write a message to the new family on. (I'm using them to create a little something for my sister's new family, which you'll get to see when it's all finished) Since I had already used Cathie's onesie template for the invites and the banner, I decided to trace my onesie cookie cutter instead! (It is also shorter and wider, which I preferred for the purpose. I used the same yellow and green paper as I did for the invites, and I also found a blue textured paper. I laid the tags out on a little table with some instructions and some fine point sharpies. 


I'll be sure to give you the full run-down on what I did with these as soon as I finish up!

Baby Shower Series: Gathering Supplies

Sunday, October 17, 2010


Well, folks, it's time to get down to the nitty-gritty details. I wish I could show you nice pictures for the duration of this series, but we have to talk details if I'm going to have you fully informed!

So here is my checklist of supplies for my onesie decorating station. Remember, I didn't do any dying. If you don't have a ton of space, I don't think it's a good idea. I had the kitchen table set up for onesie decorating, with 4 chairs. There was lots of seating in the living room with the munchies and drinks on the coffee table. For anything requiring an iron, we had a little "ironing station" set up on the counter. We laid down an old towel and had some scraps of cotton fabric sitting nearby for pressing cloths. I made sure the iron was on a setting that was appropriate for all the materials involved so that nobody would accidentally burn anything.


Supplies Checklist
fabric markers
dimensional fabric paints
fabric screen printing paints 
or non-dimensional fabric paint
flocked iron on letters, 2 sets
jumbo felt iron on rick rack
knit appliques
iron on decals
freezer paper stencils
fabric adhesive
foam brushes
trays for paints (I used foil tart cups)
cardboard for inside onesies (so paint won’t soak through)
pressing cloth
white plastic tablecloth
 scissors
 fabric scraps
freezer paper
interfacing scraps
masking tape
embroidery thread
needles 
pincushion
regular thread

Nobody used the masking tape, or sewing supplies. We glued and ironed the appliques on. I brought fabric, interfacing and freezer paper scraps in case anyone wanted to create their own appliques or freezer paper stencils. This ended up being great because I had to remake one applique that didn't work quite right the first time, and another guest also cut some of her own lettering out of the fabric. 

I made all the iron on decals and appliques ahead of time. For the iron ons, I bought a package of Transfermations Dark Stretchy Fabric Iron On Paper with 3 sheets. I found a bunch of images online that I thought were cute and some that specifically fit the interests of my sister and her husband (for example, the Vancouver Canucks logo, and a picture from the book Where The Wild Things Are). I had them all cut out in advance and  I wrote the directions on the envelope I stored them in. As for the appliques, I'm putting together a quick tutorial to show how I did it. Once I have it done, I'll post it and link up to it from this post. 

When the day of the shower came around, we put the table cloth on the table and arranged all the supplies. I arranged similar supplies together, and had some things in small containers and others scattered around. Being that it was a small table, it didn't really matter. If you had a larger table and more people working at once, you'd probably want to do more scattering.


Just a word of caution: 
Make sure that you are familiar with how to use each of the items you have available for your guests to use and always be available to help them out. The host needs to be the expert! And because there are a bunch of iron on items that all require slightly different processes, it's important that you are there to help your guests so that everything works out for them! 

I hope this post wasn't too boring, but I think it's totally necessary if you want to throw this type of shower! 

Baby Shower Series: Gifts

Saturday, October 16, 2010


Good Morning!

Well, I know that when you're planning a baby shower, it can be a little crazy. BUT you still have to think about a gift. When I had my little guy, an awesome friend of mine bought a little something for him, and something just for me. It was some nice bath stuff and it was a really special gift. Every new mom loves getting tons of stuff for her new baby, but it can be really special when somebody gets something for you too!

So that's why I got two separate gifts, one for the little guy and one for my sister. I bought a bath bomb, soap and a massage bar from LUSH, a nice natural sponge from the drug store, and then I used the extra set of bath stuff from my party favours as part of her gift. I found a cute (and cheap) basket at Michaels and arranged everything inside. Since the basket was quite deep, I loosely crumpled 4 sheets of tissue paper and packed them into the bottom of the basket. Then I took a square of orange linen from my fabric stash, crumpled it (because linen wrinkles so easily), and put it on top of the tissue and tucked it in around the edges. Then, after arranging all the items, I shrink wrapped the whole thing (you can find shrink wrap at the dollar store) and tied on some ribbon [I took the picture before the ribbon step...oops]. Ta-da! A nice gift basket for my big sis.


For the little guy, I had a bunch of clothes that I had bought over the past few months, and a board book. I bought a plain white box with a lid from Michaels, and some really cute blue ribbon. I put everything inside, tied the ribbon on and that was it. I love the classic look of this gift! [And you could definitely reuse the whole get-up]

Baby Shower Series: Food!

Friday, October 15, 2010


Good Morning!

I was clever and found a way to amalgamate Food Friday and the Baby Shower Series. Today we'll talk about what we were eating at the baby shower last Saturday. My mom was really helpful and got together the non-sweets. She put together a delicious tray of veggies and dip and brought along some juice and pop. My auntie (whose house we had the shower at) had coffee and tea going. And I made some sweets! I made butter buns, chocolate onesie cookies and chocolate chip cookies. Someone else also slipped in the other stuff (I'm not even sure what it is), but I'm not sure where it came from! As you may know, I've already shared two of the above recipes, so click on the links for those posts. I didn't quite go as crazy with the onesie cookies this time, but luckily for me, white onesies with a little decoration fit the whole theme quite well. They didn't do awesome with being frozen, transported over 600 km & then thawing (some of the icing got smudged), but that's ok.


So the only recipe you don't have is for delicious chocolate chip cookies (that are totally hidden in the above photo)! These are obviously a classic. Here's the recipe I've had the most luck with.

Ingredients:

1/2 cup butter
1/2 cup brown sugar
1/2 cup white sugar
1 egg
1/2 tsp vanilla
1 cup + 2 tbsp flour
1/2 tsp baking soda
1 cup chocolate chips

Directions:

Preheat oven to 375 degrees Fahrenheit. Cream butter and sugars well. Add egg and vanilla. Beat for a couple minutes. Add remaining ingredients and mix thoroughly. Drop tablespoonfuls on a cookie sheet and bake for 8-10 minutes.


Baby Shower Series: Decor

Thursday, October 14, 2010


Welcome back to the Baby Shower Series!

Today we're going to talk about the decor for the baby shower. I didn't do much for decor because I was spending so much time on everything else. But I did make this awesome banner! I had the idea just a couple days before the shower, but I had to go for it because it fit the theme perfectly.


It's a onesie banner! I used blue and green cotton knit and interfacing for the onesies. I traced the invitations onto freezer paper and ironed it onto the fabric. I ironed on the interfacing on the other side and cut it all out. I peeled off the freezer paper and had some nice, clean cut onesies. (The interfacing keeps the knit from curling at the edges.) Then I made freezer paper stencils of the letters and hearts and put one on each onesie. The white paint took many coats, but I'm happy with the result. Once I got enough fabric paint on and it dried, I peeled off the stencil and heat set the letters.

I found some mini clothespins at Michaels and used some thin hemp string for the clothesline. I assembled it all at the shower and it looked like this. (I just hung it with some painter's tape which doesn't look perfect, but who cares!)


Baby Shower Series: Favours

Tuesday, October 12, 2010


Welcome to another post in my baby shower series! This time we're going to talk about favours.

It's always nice to have a little something for your guests, to thank them for coming. Usually, you play games at showers and you can hand out favours as prizes, but we didn't really have time for games. So I just made up some favours for everyone. Let me say this: I went a little overboard. Cost wise, no, but time and size wise, YEP. All of this stuff cost me very little (I mean a lot of supplies I had on hand, so they cost me something at some point, but not recently so they feel almost free). I made up a little favour pack for everyone that had 3 things in it: a bar of soap, a jar of sea salt body scrub, and a little bag of fizzy bath stars. Since this post would be massive if I explained each here, I put directions for each item on a different page and just linked up the pictures!


Now that you've figured out how to make these wonderful bath items, let's talk about packing them up to look nice! Just to remind you, I went pretty crazy with these favours, but it was lots of fun. I used 125 ml canning jars for the body scrub, plastic wrap for the soap, and some small zipper bags for the bath fizzies. I had some sticker paper on hand from a long time ago, so I made some labels for everything.


For the jars, I used these blank templates from Martha Stewart's site. I copied them into my word processor and added the font on top. Then I experimented with the size on plain paper until I got the right size. I printed them off at 65% size for them to fit the jar lids.


For the other two things, I just made rectangle labels on my word processor and added font.


I also put a little rectangle of card stock in the bags so that they stayed in place (and it looked nice).


Then I bought some colourful paper bags at the dollar store and put everything inside. I rolled the tops and taped them shut. I had bought these cute stickers (that I was planning on using for the invitations, but didn't) a while ago so I put them in top of the tape to look cute.


Then I made a sticker with the little guy's picture that said "Thanks for coming". They turned out pretty nice.

I also made two favour bags for my little guy and my cousin's daughter because they're old enough to wonder why everyone else is getting a colourful bag. I filled little bags with Teddy Grahams and Animal Crackers, and then put in a little halloween light up toy in for them. I figured they would like these a little more than bath stuff! The little wands turned out to be a big hit!