
My first ever tutorial is here! Welcome, and please feel free to leave me some feedback in the comments section, I'd like to know where I need work on my tutorial skills.
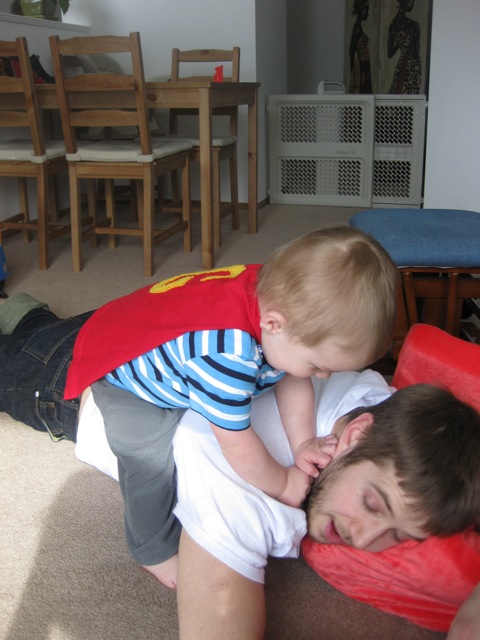
If you haven't yet seen these in action, check out my last post for photos of my son and his cape. This is incredibly easy to make. You can make it a simple project, like the tutorial will show, or you can get creative with other fabrics and make something more complicated.
What you need:
-Scissors
-An old t-shirt, medium works for a toddler like my son
-Sewing machine, or a needle and thread
-Thread that matches your fabric
-Some kind of marking tool for your fabric that will wash/fade out
-One sheet of felt, or a decent sized remnant, in a colour that contrasts with your base fabric
-Embroidery thread in a different colour than the felt and the base fabric
-A needle big enough to handle embroidery thread
-Ribbon, 1/4 - 3/8 inch wide
Get your measurements:
-Measure your child's shoulder width (or guess, like I did) and make this the measurement for the top of the cape. Double this number for the width of the bottom. For the length, I used the same number as the width of the bottom, but you can also measure how long you would like it to be on your child, and use that number.
-So my numbers were 8 inches wide at the top, 16 inches wide at the bottom, and 16 inches from top to bottom.
Cut out the pieces:
-Take your old t-shirt and lay it out flat on your cutting surface.
-Make sure that the bottom hem on the front and back lines up because this will be the bottom of your cape.
-If you the length of your cape is equal to or smaller than the length from below the sleeve to the hem AND there is no seam there, use this fold.
-If not, you can draw your cape on the back of the shirt by folding it and drawing it according to the following directions
-I used the right side fold for my cape

-Measure 8 inches (or your bottom width measurement) from the fold and mark this on the bottom of the hem
-Along the fold, measure 16 inches (or your length measurement), plus 1/4-1/2 inch for a seam allowance, from the hem and mark this
-From this mark, measure 4 inches (or your top width measurement) from the fold
-Finally, draw a diagonal line from the top to the bottom mark, it should look like this:


-If you want to use a computer font, just type your letter into your word processor, make it as large as you need (I used size 375 font) and print it off.
-Tip: Try changing the font colour to a light grey so that you aren't wasting a ton of ink.
-I wanted my "M" to be wider, so I just modified it a little:

-Cut this letter out and then trace it or pin it onto your felt and cut it out.
Put it all together:
-Now that you have all the pieces, take the cape over to your sewing machine and hem the top. You can fold it over once or twice, to your taste.
-Make sure that the hem is a little wider than your ribbon AND that you start sewing about 1/4-1/2 of an inch from the edge of the fabric on the inside of the cape because you'll be tucking the ribbon in here (see the next couple photos if you don't understand).

-Next you need to put the ribbon in; tuck it into the part of the hem that you left unstitched and sew through all the layers.
-I sewed back and forth a few times because we all know that kids put our seams to the test sometimes!

-Repeat so that both sides are attached, and your cape should look like this:

-Since this fabric doesn't fray, I left the sides unfinished.
-However, I don't trust the hem to stay put after I cut through it, so I stitched along each end of the seams so that they aren't going anywhere. If your thread matches, you'll never even notice this afterwards.
Before my added stitch

After (it is vertical, on the right side, almost invisible)

-Finally, it's time to add your felt letter.
-I didn't use any fabric stabilizer or adhesive to apply the applique because felt is very forgiving and I'm just lazy sometimes!
-I just laid the letter where I wanted it and started stitching
-I placed it slightly off-kilter for a fun look, and because then you can't tell if it isn't exactly where I wanted it to be

-I thread my needle like the photo below so that only one layer of embroidery thread is in each stitch, rather than double.

-You can either cut the embroidery thread after you have sewn the letter on, or just cut yourself a very generous amount now
-Either way you have to pull a lot through with your first stitch, leaving a small tail on the wrong side of the cape (the photo below is what happens when you finish, you'll have two tails)

-I just did a straight stitch all the way along, but feel free to experiment with other stitches

-This is the longest and most tedious part of the project, but when you finally finish, tie the two ends of thread in a couple knots to secure it (not too tight or you'll mess up the stitches)

-Finally, trim the ends and tie the cape on your little superhero!

Warning: These capes may inspire superhero like behaviour
Thanks for reading and good luck. I'd love to hear if anyone tries this out!

1 wonderful comments:
This is such a cute idea! I hope I have someone to make this for one day :)
Post a Comment