
Welcome to my dust ruffle tutorial!
I made this dust ruffle for my son's Sniglar bed from Ikea. If you're lucky and have the exact same bed, then you can follow my directions exactly, if not, you'll have to do some of your own measuring. I think the bed base on most cribs attaches to the frame at the corners, so this tutorial should work for all in that way. Also, my son's crib is quite low to the ground, but many are much higher. This will obviously affect the size of your dust ruffle.
Here we go!
You need to take measurements before anything else. Find out the width and length of the base that your mattress sits on as well as its height from the floor.

As you can see my son's slatted bed base is 52 x 27 inches, and the height of the bed base is about 6.5 inches.

Based on these measurements, this is what I used:
A. a 53 x 27 inch rectangle of broadcloth (you can use broadcloth, muslin, or even an old sheet!)
B. four 27 x 8.5 inch pieces of your main fabric
C. four 14.5 x 8.5 inch pieces of your main fabric
D. two 11 x 8.5 inch pieces of your accent fabric
E. two 9 x 8.5 inch pieces of your accent fabric
Now let's get started!
Take one piece B and one piece D, with right sides facing match a short edge of each and sew. Sew a second piece B to the other short edge of the D piece. (see next photo if you need a visual)
Repeat with the remaining two B and D pieces. Then repeat the same process with C and E pieces. You should now have four strips of fabric with an accent piece sandwiched between two main pieces.


Press seams flat and hem one long edge of each strip. You should now have four strips like this:

Take one long strip and fold along one of the seams between the main fabric and accent fabric, and press. Repeat with the other seam on this strip and then do the same to the other strips.

When you have the piece sitting right side up, fully stretched out, it should look like this:
Stretch one long piece out again and fold it in half, right sides together. Crease with your fingers.

Unfold. Lay flat and pull one creased seam in towards the centre line on your accent fabric. Leave 1/4 inch between the seam and the light centre crease.

Pull the other seam in the same way.

Press in place.

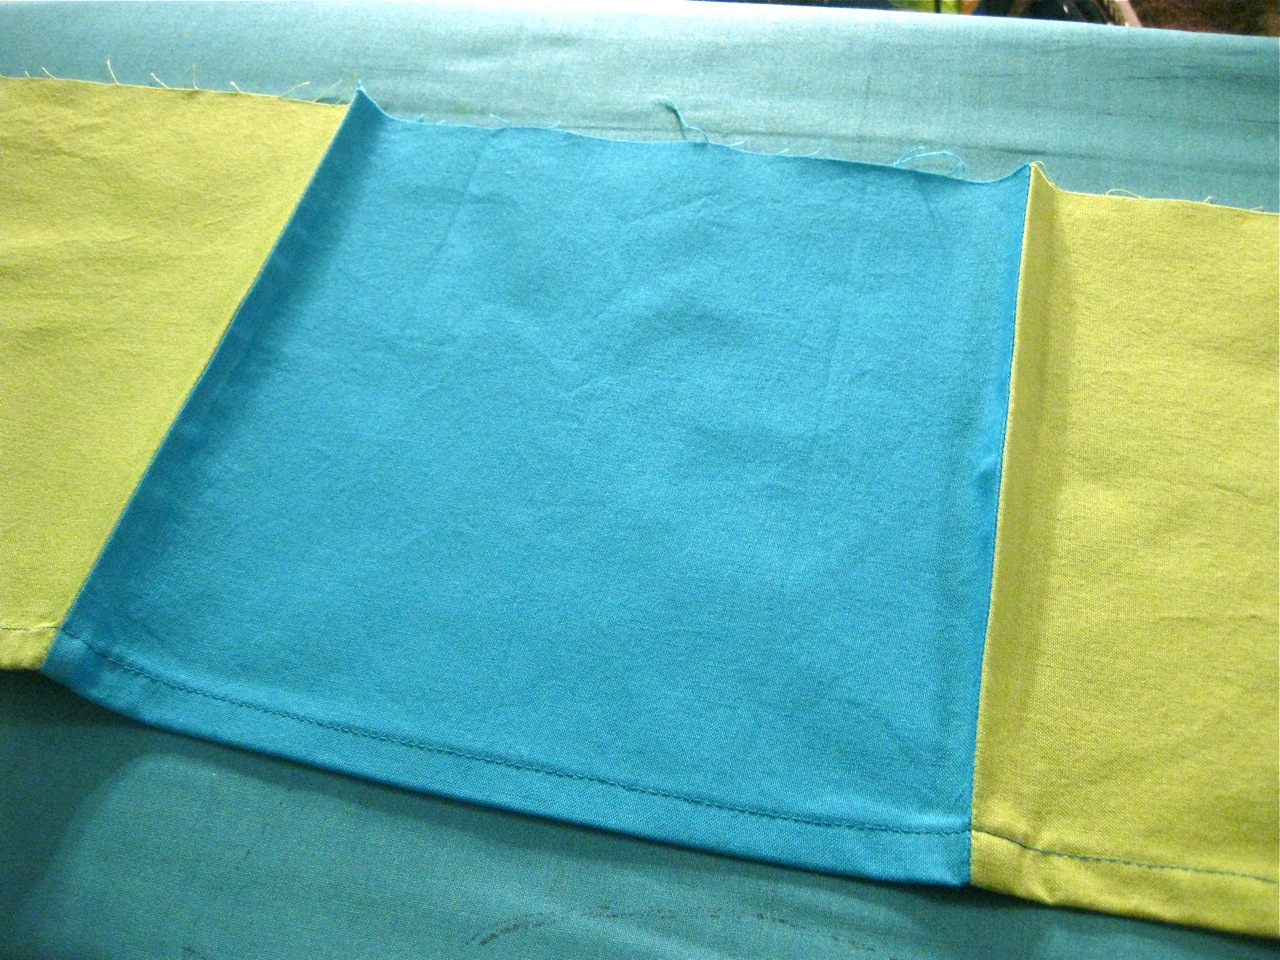
Your fabric should now look like this:

Baste along the rough edge to hold pleats in place. Repeat with the other 3 strips.

Now you need to lay your strips out flat and measure the length. They should be about 1-2 inches longer than the length of your bed base. According to this measurement, hem the raw short edges on either side of each strip. (For example, if your strip is 54 inches long, fold each side over 1/2 inch twice and hem.) Repeat with all strips.

When you're done hemming you should now have 2 strips that measure 52 inches in length and 2 that measure 27 inches in length.
Now you need to sew it all together! Grab piece A and start with one of your long strips. Match its raw edge to the long raw edge of piece A. Make sure you leave about 1/2 inch of the broadcloth free on either side of the strip because you'll have to sew your shorter strips there. Sew piece A to the first long strip, then the other. Sew the shorter strips on last.
And ta-da, you have a bed skirt! If you wish, you can sew your seams flat at the end to tidy things up a bit.

If you have any feedback for my tutorial, I'd love to hear it. This is only my second tutorial ever, so I'm sure it could use some work! And if you make a bedskirt with this tutorial, email me a photo. I'd love to see it. :)

2 wonderful comments:
great job! I am loving that pleat in the middle. Thanks for linking to Take-A-Look Tuesday over at Sugar Bee Craft Edition - Mandy, www.craftedition.blogspot.com
The article was very interesting and informative for me.
Post a Comment